I'm James. This is my year of travel.


|
Jun 21,2019• Proven solutions
-->
One of the best ways to get that professional look to your videos is by adding a good quality intro to them, and with After Effects it isn’t as daunting a prospect as it would seem, you can create some highly professional intros using just the basic After Effects presets and effects.
Drivers cavo adattatore usb midi arduino. Sep 13, 2015 You'd have to make the USB device identify itself as a MIDI device and write the firmware to make it communicate with the proper MIDI class compliant Windows or Mac drivers with the proper protocol. The good news is that the operating system has standard MID drivers so you don't have to write your own driver. Cavo adattatore interfaccia usb midi in/out pc. ADATTATORE USB TO SERIAL USB to Serial TTL 3.3v-5v per Arduino. Download '170.IU0.LFS.SB0 09/05 USER MANUAL ISTRUZIONI D'USO. MIDIUSB library. These library allows any microcontroller with native USB capabilities (atmega32u4 based boards or ARM boards) to appear as a MIDI peripheral over USB to a connected computer. The text of the Arduino reference is licensed under a Creative Commons Attribution-ShareAlike 3.0 License. Code samples in the reference are released.
This is a basic tutorial about After Effects, professional video editing software. However, if video editing is new to you, consider Wondershare Filmora, which can help you make unique and professional intros with ease. Download the free trial version below.
Can anyone advise me,how can I download download cc light sweep plugin for After effects CS4 trial. After Effects CC (12) Jun 13 2013. Live 3D Pipeline. Objects and scenes from popular 3D modeling and animation software Cinema 4D can be used directly as footage inside After Effects without rendering first. This eases roundtripping between the programs and opens up numerous creative possibilities.
How to Make an Intro in After Effects1Setup
First off we set up our composition, I’m using 320x240 for convenience of the web output but if you plan on using your intro on your YouTube channel for instance, you want high quality output that matches your video files, for most people these days that would be 1080p.
To this we add a solid layer by using Layer>New>Solid, I left mine Black but you can choose a color appropriate to your needs. On top of that we added our text layers by using the text button in the top menu with our title, YouTube channel name or similar on it, I used a separate layer for each word so we can manipulate them independently, and so finally we have this.
As you can see , we have our background, and two text layers, one with the word ‘Wonder’ in it, one with the word ‘Share’ in it. By hitting the selection tool (the arrow at the far left of the top menu) you can drag the text around to place them precisely as you want. At this point you should also make sure your text is a nice color to match either your branding or other factors. I’m going to change one word to a deep blue color to differentiate it, this is done by selecting the text and using the tools in the text panel to alter the color. Our final setup for the intro thus looks like this
After Effects Cc Light Sweep2Adding the first effect
The reason I went to the trouble of having the text on separate layers is so I could have them appear at different times, I want the eternal part to come in second, so to do this I drag the layer along the timeline so it starts at the 5 second mark.
Now I go back to the start of the timeline and take ‘glow from the effects and preset tabs and drag it onto the wonder layer, I repeat this with the share layer to give a nice glow to both texts.

You can play with the settings of the glow effect in the effects panel to the left to get the look you are after, and that is our initial effect done.
3Adding in the Transition
As it is an intro, you don’t want your titles or brand name to just appear on the screen, and so here we use the effects within After Effects again. Highlighting the Wonder layer we select our transition. I picked CC Light Wipe as I like the effect, but you could try different ones to find your favorite.
After Effects Cc Light Sweep Plugin Firefox Update
Having applied the transition to the layer I now need to adjust it, I want the transition to finish as the second text appears at the 5 second mark. So I set my first keyframe for the transition at the zero timeframe point. I set the ‘completed’ value to 100% so the word is completely invisible at the start and then appears at the 5 seconds where I set the second keyframe with a completed value of 0%.
This is essentially running the effect in reverse but it still works well to my eyes. As we can see, the effect finishes one frame before the second word appears, but I don’t want that to just pop up, so we want to look at adding in an effect there too.
4The second Transition
You could use the same effect for both of course, I chose the CC Radial Scale Wipe, it’s just an effect I find pleasing. I added it to the layer, then set the ‘completion’ to 100% to ensure my text was invisible and set the first keyframe here.
Then I moved the timeline on for 3 seconds to the 8 second mark and added the second keyframe with the transition completion set at 0%, so the word is fully visible.
If a missing font is not found in the FontExpert Library view, it will not be activated, and the font will be marked by InDesign as a missing font (for the current document). The plug-in searches for fonts in FontExpert font Library. Automatic Activation The Missing Fonts Loader Plug-in loads missing fonts automatically when you open an Adobe InDesign document. Axt advertising medium font. Missing Fonts If any fonts in a document are missing, Adobe InDesign displays a warning window.
5Light sweep
To complete the effect, once the two words have appeared I wanted to add in a final flourish, and here I chose the CC Light sweep effect found in the Effects>Generate section, there are several to try, I just like this one.
In the settings tab I matched the light color to the blue of my text using the eyedropper tool, and set several keyframes so the light swept around the frame and faded out. The procedure is the same as other keyframes, setting the start keyframe for each attribute you wish to change, moving on the timeline, setting the next values and so on.
In this case I used the direction (to move it around the frame), sweep intensity and edge intensity (both reduced to 0 to fade out the effect) attributes to get the look I was after.

I started off by setting both intensity attributes to zero, so they would not show during the initial text transitions, I then added keyframes for direction and both intensity settings right at the point where the final text transition ends, this brings up the intensity and sets the direction of the light beam as I want it to first appear, then at 3 second intervals I set keyframes for the direction so the light travels all around the screen, and the final keyframes I reduced the intensity back down to zero for both sweep and edge settings so the effect essentially fades away at the end of the sequence.
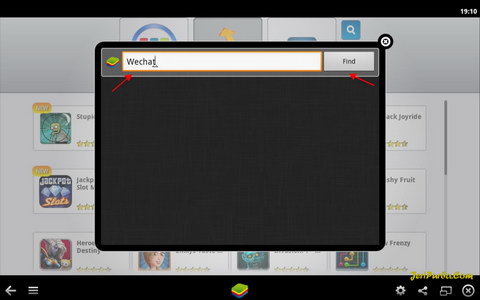
I synced my mobile app with the computer version once I downloaded WeChat for my PC, using the QR Scan code. It was very easy to do. It was hard to locate WeChat once I downloaded it, I expected to be able to access the app simply by pinning it to my task bar and clicking on it. That does not work, I hope this changes soon with an update.
This means we now have a nice introduction where the individual words transition in and a light effects plays around them.
6Conclusion
That was a short into made just using the tools found within the standard After Effects library, as we can see it is not a complicated job to add some professional looking effects to the intros of your videos, I simply picked transitions and effects I happen to like, but there are many more included in After Effects id these are not to your tastes, if you are not sure what some of them look like and do not have Bridge installed to allow previews, simply add them to the layer and run through the completion setting to see what it does.
If you want to go further, you can buy many different plug-ins to apply other effect types, optical flare and other effect packages can be easily added, they work just like the presets and effects within After Effects itself and can expand on the possibilities you have.
Easy-to-use and powerful video editor for all creators.
Bring up your video to a professional level with straightforward tools.
Tilt shift makes your video and images look miniature, like toys. In this project, they use Posterize time, Camera Lens Blur, CC Light Sweep and Fast Blur to create the effect.
Premium Beat also has step by step tutorials in images and text, if you don't like watching tutorial videos. Read the Tilt Shift instructions here.
Looking for Tutorials to create Tilt Shift? Check these out.
If you're looking for some Tilt Shift Inspiration, check out The City of Samba by Keith Loutit and Jarbas Agnelli.
Posted by Michele Yamazaki
Comments are closed.
|
AuthorWrite something about yourself. No need to be fancy, just an overview. ArchivesCategories |
 RSS Feed
